本文按照时间顺序,记录博客的装修进程,着重记录踩坑和经验,希望能给和我遇到一样问题的小伙伴一些参考。
2026.5.31 重新配置网站HTTPS访问
许久没维护博客,出现了很多问题。
- GitHub远程SSH过期,本地无法推送代码到远程
- 网站只能通过GitHub Pages访问,域名访问失效(HTTPS)
问题1 重新生成SSH
GitHub 会自动删 “一年不用” 的密钥 SSH key
- 测试旧密钥还能不能用
输出 Hi xxx! You've successfully authenticated... → 能用,别删!
输出 Permission denied (publickey) → 不能用,必须换新的
- 生成新密钥
1
| ssh-keygen -t ed25519 -C "你的GitHub邮箱"
|
一路回车,不用输密码。
- 复制密钥到剪贴板,然后复制到GitHub上
1
| clip < ~/.ssh/id_ed25519.pub
|
GitHub → 右上角头像 → Settings → 左侧 SSH and GPG keys → New SSH key
把刚才复制的内容粘贴进去,保存。然后重新试一下步骤1是否生效。
- 重新部署hexo
1
2
3
| hexo clean
hexo g
hexo d
|
问题2 配置域名访问和HTTPS证书
阿里云安全组放行80和443端口。
进阿里云 → 你的 ECS 实例 → 安全组 → 入方向
配置nginx监听80和443端口
在这个路径/etc/nginx/conf.d文件夹下创建blog.conf,里面配置监听端口。
/etc/nginx/nginx.conf是总的配置文件,需要在这里配置:
1
2
3
4
5
6
7
8
| .....
http {
...
include /etc/nginx/conf.d/*.conf;
}
|
这样后续nginx
检查nginx是否在运行
ps aux | grep nginx如果什么都不输出,说明没有运行
重启nginx
systemctl start nginx
检查nginx目前的监听的端口,必须有80和443
netstat -nltp | grep nginx
阿里云中配置DNS解析
第一条(主域名)
- 主机记录:
@
- 记录类型:
A
- 记录值:填你的服务器公网 IP(如 123.45.67.89)
- TTL:默认
第二条(www 域名)
- 主机记录:
www
- 记录类型:
A
- 记录值:同样填你的服务器公网 IP
- TTL:默认
加一条正确的 CAA(允许 Let’s Encrypt)
- 主机记录:
@
- 类型:
CAA
- 线路:默认
- 记录值:0 issue “letsencrypt.org”
安装HTTPS证书
下载安装工具 apt install certbot python3-certbot-nginx -y
一键生成 + 自动配置 HTTPS certbot --nginx -d 域名 -d www.域名
输入邮箱:随便输
同意协议:Y
是否分享邮箱:N
选择 2(自动跳转 HTTP 到 HTTPS)
这个期间可能会有很多问题,可以使用下面的检查指令。
清除本地DNS缓存:ipconfig /flushdns
检查域名是否生效:ping vickkkyz.fun
检查域名指向哪个IP:nslookup vickkkyz.fun
检查nginx监听端口:netstat -nltp | grep nginx
检查nginx配置文件是否写错:nginx -t
检查nginx状态:systemctl status nginx
2024.3.12 给文章设置密码
1
| npm install --save hexo-blog-encrypt
|
然后用password字段设置文章密码
1
2
3
4
5
| ---
title: Hello World
date: 2016-03-30 21:18:02
password: 12345
---
|
也可以自定义文章的提示信息
1
2
3
4
5
6
7
8
9
10
11
12
| ---
title: Hexo-Fluid主题-给文章设置密码
categories: 学习教程
password: 12345
abstract: 有东西被加密了, 请输入密码查看.
message: 您好, 这里需要密码.
wrong_pass_message: 抱歉, 这个密码看着不太对, 请再试试.
wrong_hash_message: 抱歉, 这个文章不能被校验, 不过您还是能看看解密后的内容.
date: 2021/12/3 21:19:20
tags:
- Hexo
---
|
abstract :等同于信息头中的excerpt效果。message :是在输入密码处显示的内容。wrong_pass_message :是在输入错误密码时弹窗的信息内容。
参考:Hexo-Fluid主题-给文章设置密码
2024.1.7(1) 恶搞浏览器网页标题
在根目录/node_modules/hexo-theme-fluid/source/js这里!创建一个名为FunnyTitle.js的文件,内容如下:
1
2
3
4
5
6
7
8
9
10
11
12
13
14
15
16
17
| var OriginTitle = document.title;
var titleTime;
document.addEventListener('visibilitychange', function () {
if (document.hidden) {
$('[rel="icon"]').attr('href', "/image/beautify/xinsuixuanzhong.png");
document.title = '_(:з」∠)_不要走!';
clearTimeout(titleTime);
}
else {
$('[rel="icon"]').attr('href', "/image/beautify/favicon.ico");
document.title = '(*/ω\*)你来啦~~';
titleTime = setTimeout(function () {
document.title = OriginTitle;
}, 2000);
}
});
|
然后在根目录/node_modules/hexo-theme-fluid/layout/layout.ejs中引用上面的文件,具体写法:
1
2
3
| <!--写在body标签内-->
<!--浏览器搞笑标题-->
<script type="text/javascript" src="\js\FunnyTitle.js"></script>
|
参考:知乎
2024.1.7(2) 给网站添加「霞鹜文楷」字体
修改这个文件根目录/node_modules/hexo-theme-fluid/layout/_partials/head.ejs
在< head >标签内添加这段代码:
1
2
| <!-- 通过cdn引入霞鹭文楷字体 -->
<link rel="stylesheet" href="https://npm.elemecdn.com/lxgw-wenkai-screen-webfont/style.css" media="print" onload="this.media='all'">
|
在根目录/node_modules/hexo-theme-fluid/source/css下面添加文件custom.css
1
2
3
4
5
6
| html,
body,
.markdown-body,
p {
font-family: 'LXGW WenKai Screen';
}
|
在_config.fluid.html的font标签的font_family字段添加"LXGW Wenkai Screen"
1
2
3
4
5
| font:
font_size: 16px
font_family: "LXGW Wenkai Screen"
letter_spacing: 0.02em
code_font_size: 85%
|
参考:彭宏豪
2024.1.7(3) 背景固定+毛玻璃效果
博客根目录新建一个文件夹scripts,在里面新建一个文件injector.js,内容为:
1
2
3
| const { root: siteRoot = "/" } = hexo.config;
hexo.extend.injector.register("body_begin", `<div id="web_bg"></div>`);
hexo.extend.injector.register("body_end", `<script src="${siteRoot}js/backgroundize.js"></script>`);
|
在node_modules/hexo-theme-fluid/source/js下新建文件backgroundize.js,内容为:
1
2
3
4
5
6
7
8
9
10
11
| document
.querySelector('#web_bg')
.setAttribute('style', `background-image: ${document.querySelector('.banner').style.background.split(' ')[0]};position: fixed;width: 100%;height: 100%;z-index: -1;background-size: cover;`);
document
.querySelector("#banner")
.setAttribute('style', 'background-image: url()')
document
.querySelector("#banner .mask")
.setAttribute('style', 'background-color:rgba(0,0,0,0)')
|
_config.fluid.yml中修改文章背景色为透明:
1
2
3
4
|
board_color: "#ffffff80"
board_color_dark: "#00000080"
|
在node_modules/hexo-theme-fluid/source/css中新建文件cloudedGlass.css
1
2
3
4
| #board {
-webkit-backdrop-filter: blur(5px);
backdrop-filter: blur(5px);
}
|
_config.fluid.yml引入
1
2
| custom_css:
- /css/cloudedGlass.css
|
参考:清山的博客
2024.1.7(4) 修改行内代码颜色
修改这个文件:博客根目录/node_modules/hexo-theme-fluid/source/css/_ pages/_base/base.styl,找到code这一行,修改color的值。
参考:简书
2024.1.6(1) 页脚添加网站运行时间
需要修改主题的源代码,在网上搜索了很多类似的,都要改themes/source下面的文件,但是我的themes文件夹下面是空的!搜索了几篇文章,发现其实有两种方式可以加载fluid主题。
方式一:(我采用的是这种方式)
Hexo 5.0.0 版本以上,推荐通过 npm 直接安装,进入博客目录执行命令:
1
| npm install --save hexo-theme-fluid
|
然后在博客目录下创建 _config.fluid.yml,将主题的 config.yml 内容复制进去。
方式二:(网上大部分采用的这个方法,所以themes下面有内容)
下载 最新 release 版本 解压到 Hexo 博客目录中的 themes 目录,并将解压出的文件夹重命名为 fluid。
参考:https://emoryhuang.cn/blog/1729600336.html
所以方式一该怎么修改源代码呢?
我们并不是在themes文件,而是npm帮我们管理的,位置在博客根目录/node_modules/hexo-theme-fluid/source
所以!就直接在这里改。
在node_modules/hexo-theme-fluid/source/js下新增文件duration.js,内容如下:
1
2
3
4
5
6
7
8
9
10
11
12
13
14
| var now = new Date();
function createtime() {
var grt = new Date("12/24/2023 22:51:00");
now.setTime(now.getTime() + 250);
days = (now - grt) / 1000 / 60 / 60 / 24; dnum = Math.floor(days);
hours = (now - grt) / 1000 / 60 / 60 - (24 * dnum); hnum = Math.floor(hours);
if (String(hnum).length == 1) { hnum = "0" + hnum; } minutes = (now - grt) / 1000 / 60 - (24 * 60 * dnum) - (60 * hnum);
mnum = Math.floor(minutes); if (String(mnum).length == 1) { mnum = "0" + mnum; }
seconds = (now - grt) / 1000 - (24 * 60 * 60 * dnum) - (60 * 60 * hnum) - (60 * mnum);
snum = Math.round(seconds); if (String(snum).length == 1) { snum = "0" + snum; }
document.getElementById("timeDate").innerHTML = "本站已安全运行 " + dnum + " 天 ";
document.getElementById("times").innerHTML = hnum + " 小时 " + mnum + " 分 " + snum + " 秒";
}
setInterval("createtime()", 250);
|
然后在_config.fluid.yml的footer标签中添加:
1
2
3
4
5
6
| <!-- 页脚添加网站运行时间 -->
<div>
<span id="timeDate">载入天数...</span>
<span id="times">载入时分秒...</span>
<script src="/js/duration.js"></script>
</div>
|
参考:https://www.liujunxiang0076.asia/2023/08/03/hexo%E6%B7%BB%E5%8A%A0%E7%BD%91%E7%AB%99%E8%BF%90%E8%A1%8C%E6%97%B6%E9%97%B4/
2024.1.6(2) 美化的标签语法
1
2
3
4
5
6
7
8
9
10
11
12
13
14
15
16
17
18
19
20
21
22
23
| {% note default %}
default 提示块标签
{% endnote %}
{% note primary no-icon %} //可使用语法 no-icon去掉小图标
primary 提示块标签
{% endnote %}
{% note success %}
success 提示块标签
{% endnote %}
{% note info %}
info 提示块标签
{% endnote %}
{% note warning %}
warning 提示块标签
{% endnote %}
{% note danger %}
danger 提示块标签
{% endnote %}
|
//可使用语法 no-icon去掉小图标
primary 提示块标签
参考:CangLan
2023.12.26 添加嘉然看板娘
把如下代码复制到_config.fluid.yml的footer标签内:
1
2
3
4
5
6
7
8
9
10
11
12
13
14
15
| <!-- Load TweenLite -->
<script src="https://cdn.jsdelivr.net/npm/greensock@1.20.2/dist/TweenLite.js"></script>
<!-- Copyrighted cubism SDK -->
<script src="https://cubism.live2d.com/sdk-web/cubismcore/live2dcubismcore.min.js"></script>
<!-- Load Pixi (dependency for cubism 2/4 integrated loader) -->
<script src="https://cdn.jsdelivr.net/npm/pixi.js@5.3.6/dist/pixi.min.js"></script>
<!-- Load cubism 4 integrated loader -->
<script src="https://cdn.jsdelivr.net/npm/pixi-live2d-display@0.3.1/dist/cubism4.min.js"></script>
<!-- Load pio and alternative loader -->
<link href="https://cdn.jsdelivr.net/gh/vickkkyz/vickkkyz.github.io@2.0/css/pio.css" rel="stylesheet" type="text/css"/>
<script src="https://cdn.jsdelivr.net/gh/journey-ad/blog-img@76ba2b3/live2d/lib/pio.js"></script>
<script src="https://cdn.jsdelivr.net/gh/journey-ad/blog-img@76ba2b3/live2d/lib/pio_sdk4.js"></script>
<script src="https://cdn.jsdelivr.net/gh/journey-ad/blog-img@76ba2b3/live2d/lib/load.js"></script>
|
但是由于直接使用,嘉然不适应本主题(fluid),需要把pio.css文件下载下来放入本地进行自己修改给她定义一下尺寸,在#pio下面添加一个height: 240px 限制一下大小。因为博客要可以线上访问到这个url才行,所以我把它放到github上了。然后上面的那个url换成自己的地址。
1
2
3
4
| #pio {
height: 240px;
vertical-align: middle
}
|
此方法来源:叶小兽
但是!!好像就是因为github的原因,我的博客在加载嘉然的时候并没有加载pio.css这个文件,设置的大小不生效。
通过大佬Seailor的帮助,我将github的链接转换成了jsdelivr的CDN来加速访问,这样就生效了
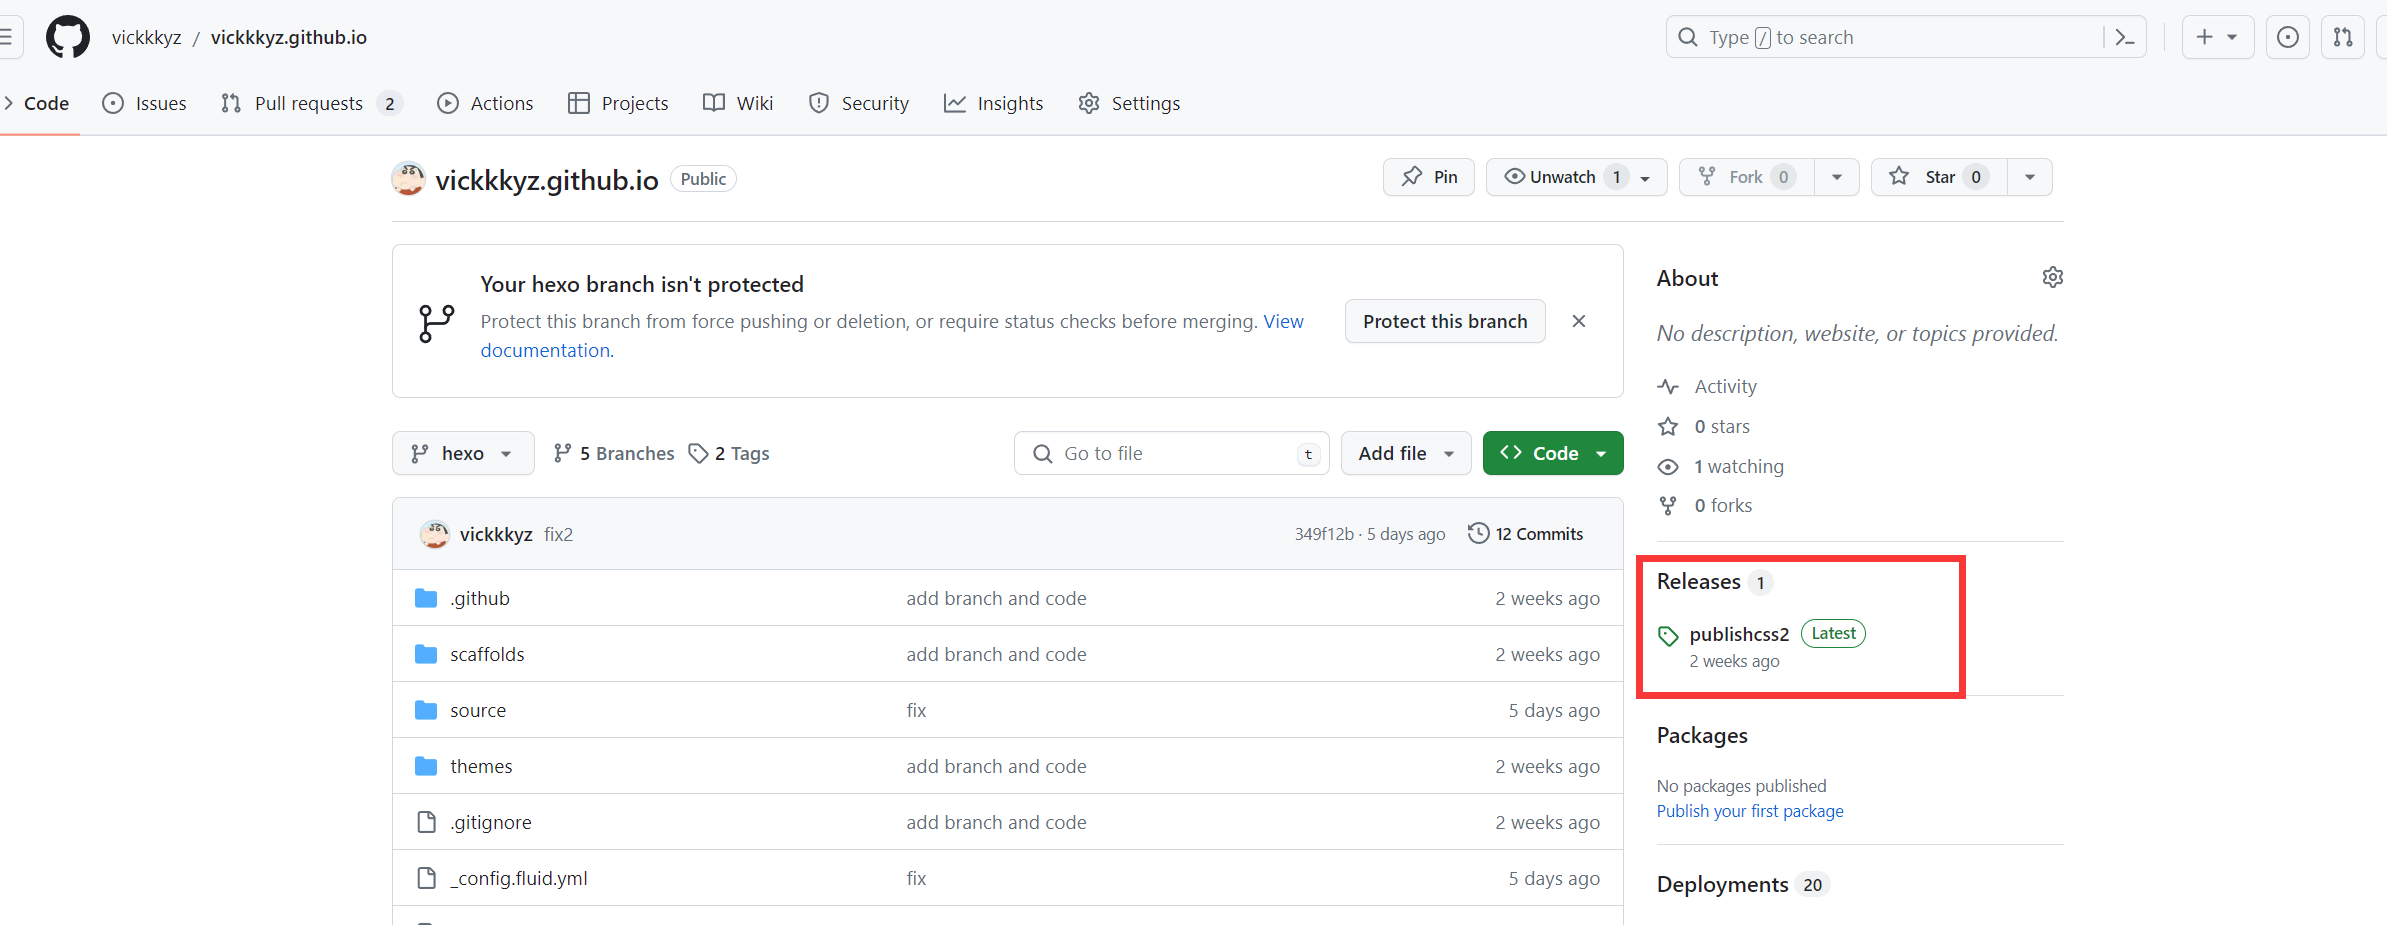
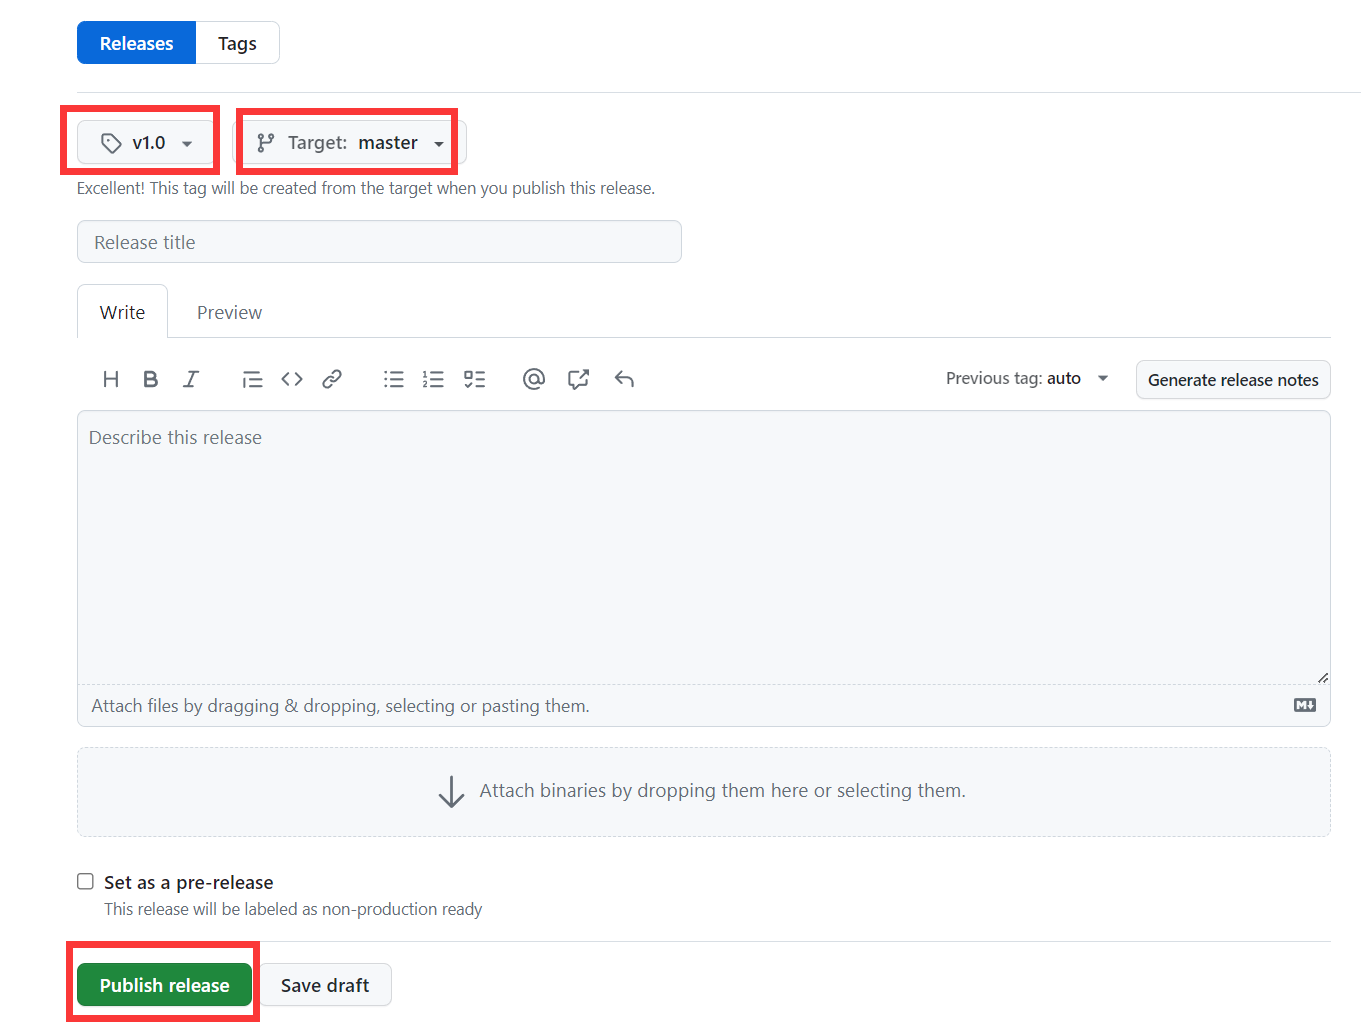
如果没设置过,这边应该是显示:Create a new release,进入下图,自己定义版本的名称,选择要发布的分支,发布之后,就可以使用, 使用方法:https://cdn.jsdelivr.net/gh/你的用户名/你的仓库名@发布的版本号/文件路径,文件路径是以选择的分支为根目录的相对路径。
比如:https://cdn.jsdelivr.net/gh/vickkkyz/vickkkyz.github.io@v1.0/css/pio.css
参考:随风
感谢:Seailor